Building off of the Journeys Overview, the purpose of this article is to outline the steps to create an example Journey which includes Individual Onboarding, Document Verification, and Credit Underwriting workflows.

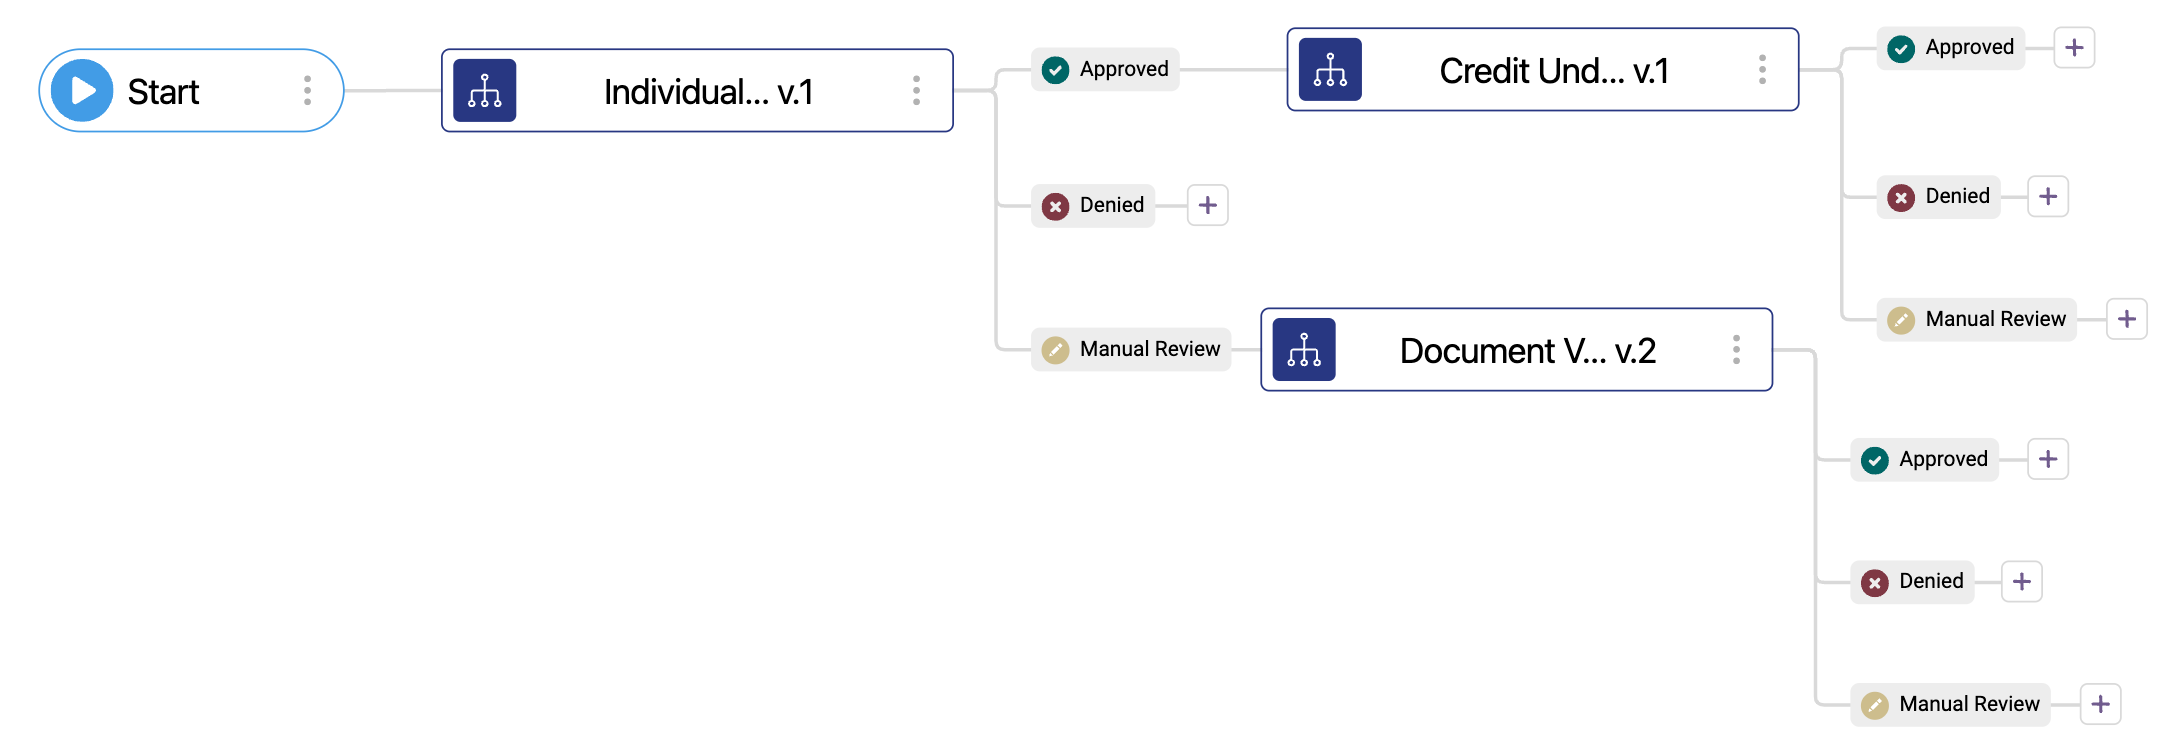
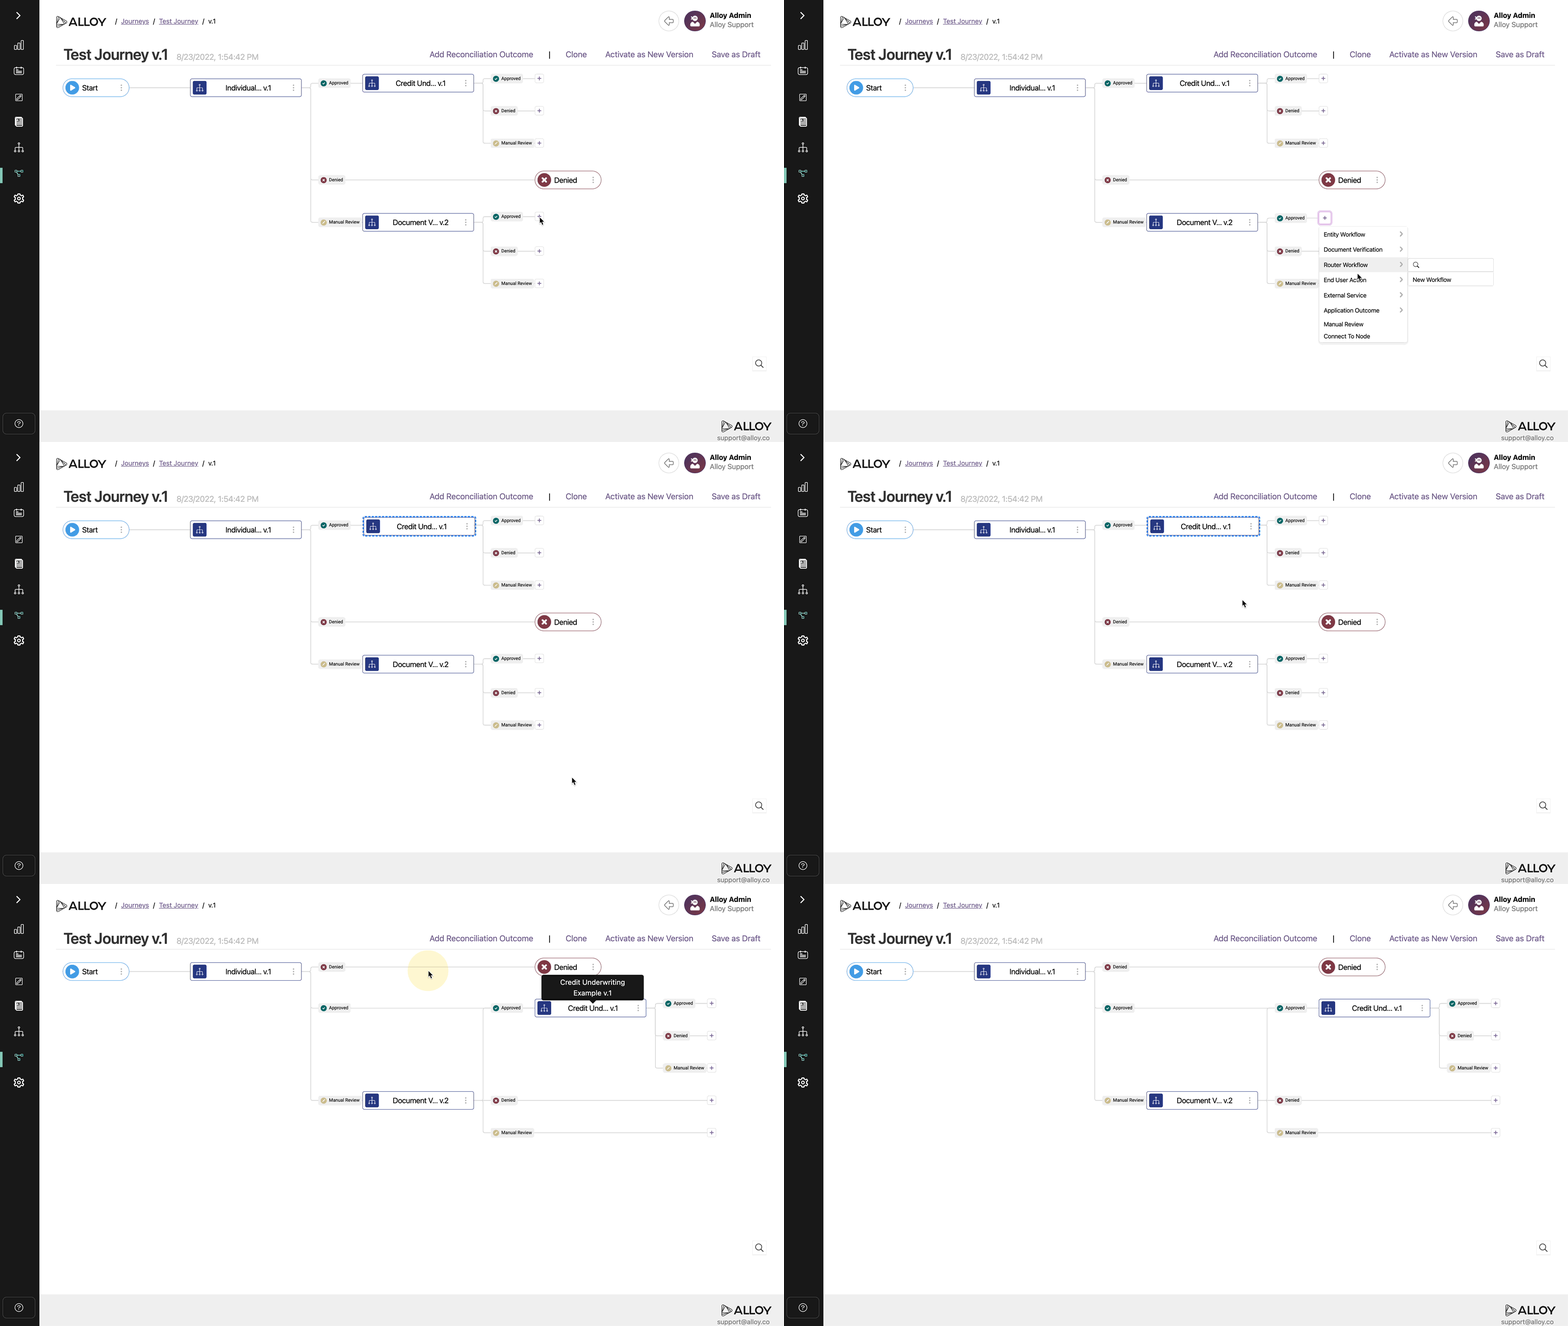
Example of the completed Journey
Prerequisites
- Journeys must be enabled in your account
- If the Journeys option is not available along the left navigation in the Alloy dashboard, contact your CSM or support@alloy.com.
- Permissions to create a Journey
- Agent can create new Workflows
- Agent can view all or specific Workflows, as well as Entities, Reviews, and Evaluations for those Workflows
- Pre-existing workflows for Onboarding, Document Verification, and Credit Underwriting
Creating the Journey
- Access Journeys by clicking the icon below the Workflows icon and above the Settings icon on the left menu in the Alloy dashboard.
- The Start node has one branch by default. To create additional branches, click the three dots and select Add New Branch.
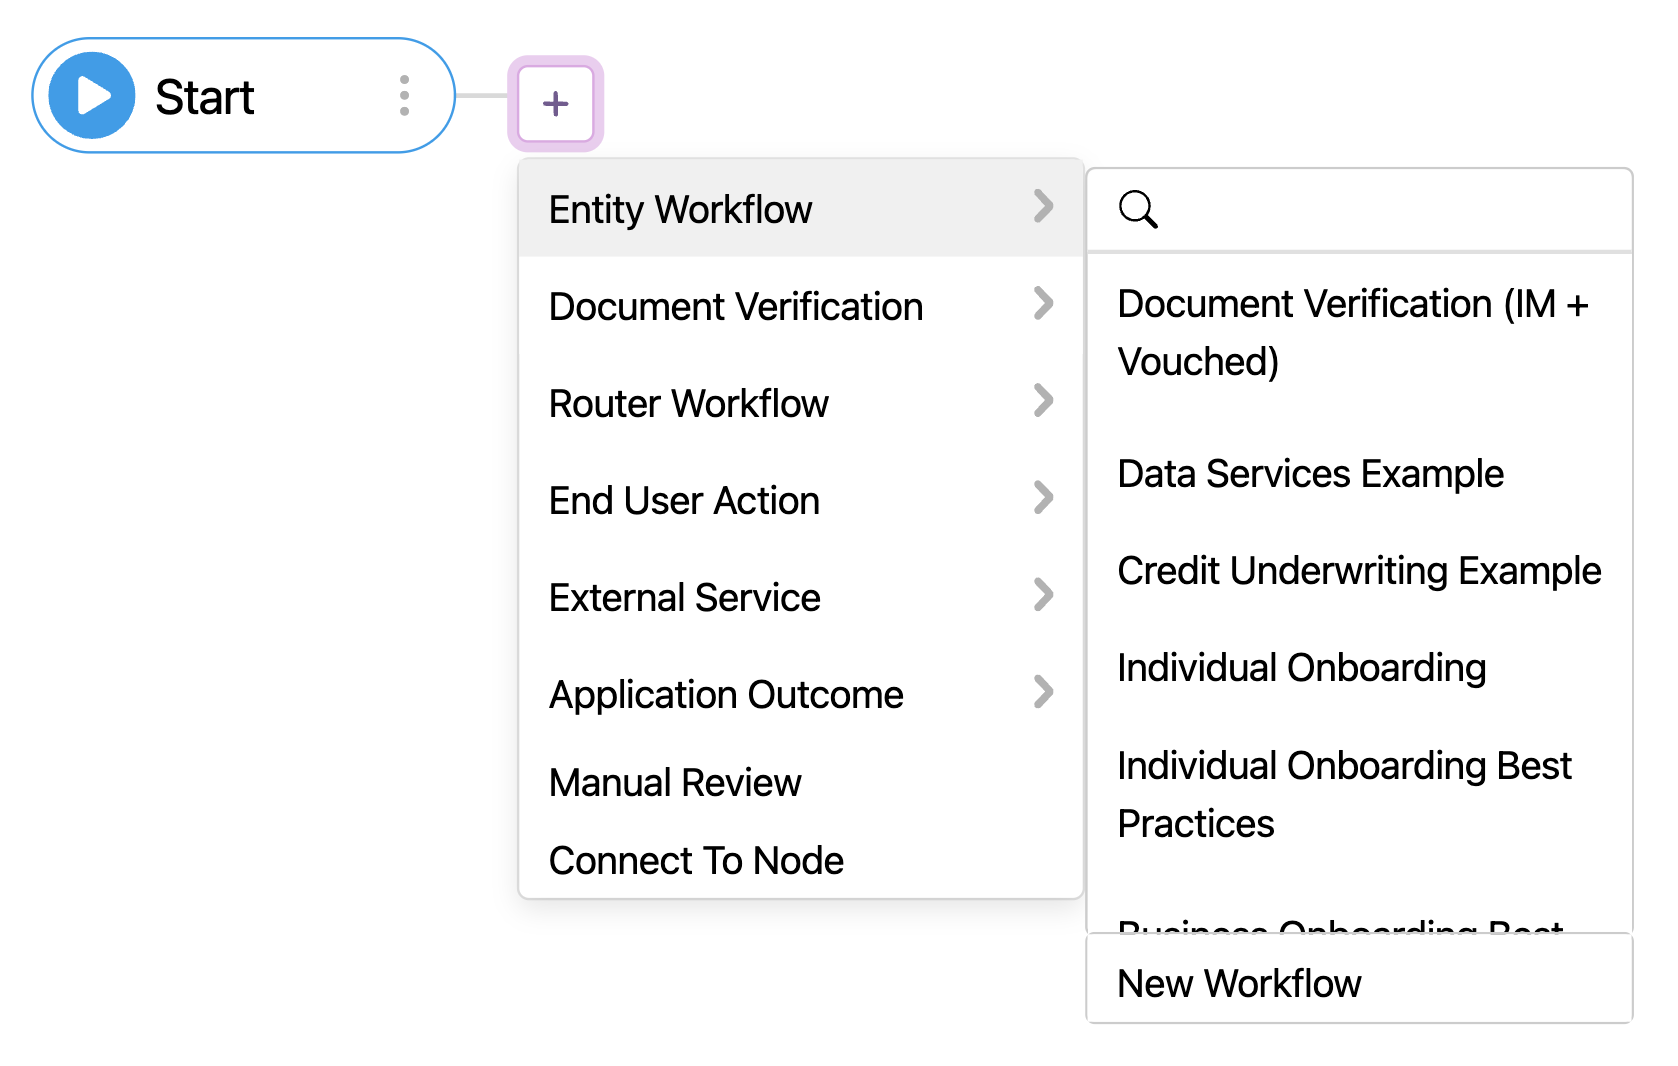
- Click the + icon at the right end of the first branch. Click Entity Workflow, then select the pre-configured workflow of choice. For example, select an Individual Onboarding workflow.

- The chosen workflow will be added in addition to Approved, Denied, and Manual Review outcome branches.

- On the Approved branch, click the + icon to select the next action. If Credit Underwriting is configured, click Entity Workflow and select the CU workflow. The CU workflow will be added in addition to Approved, Denied, and Manual Review outcome branches.

- If a Document Verification workflow is configured, on the Individual Onboarding > Manual Review branch, click the + icon. Select Step Up, then select a pre-configured DocV workflow. The DocV workflow will be added in addition to Approved, Denied, and Manual Review outcome branches.

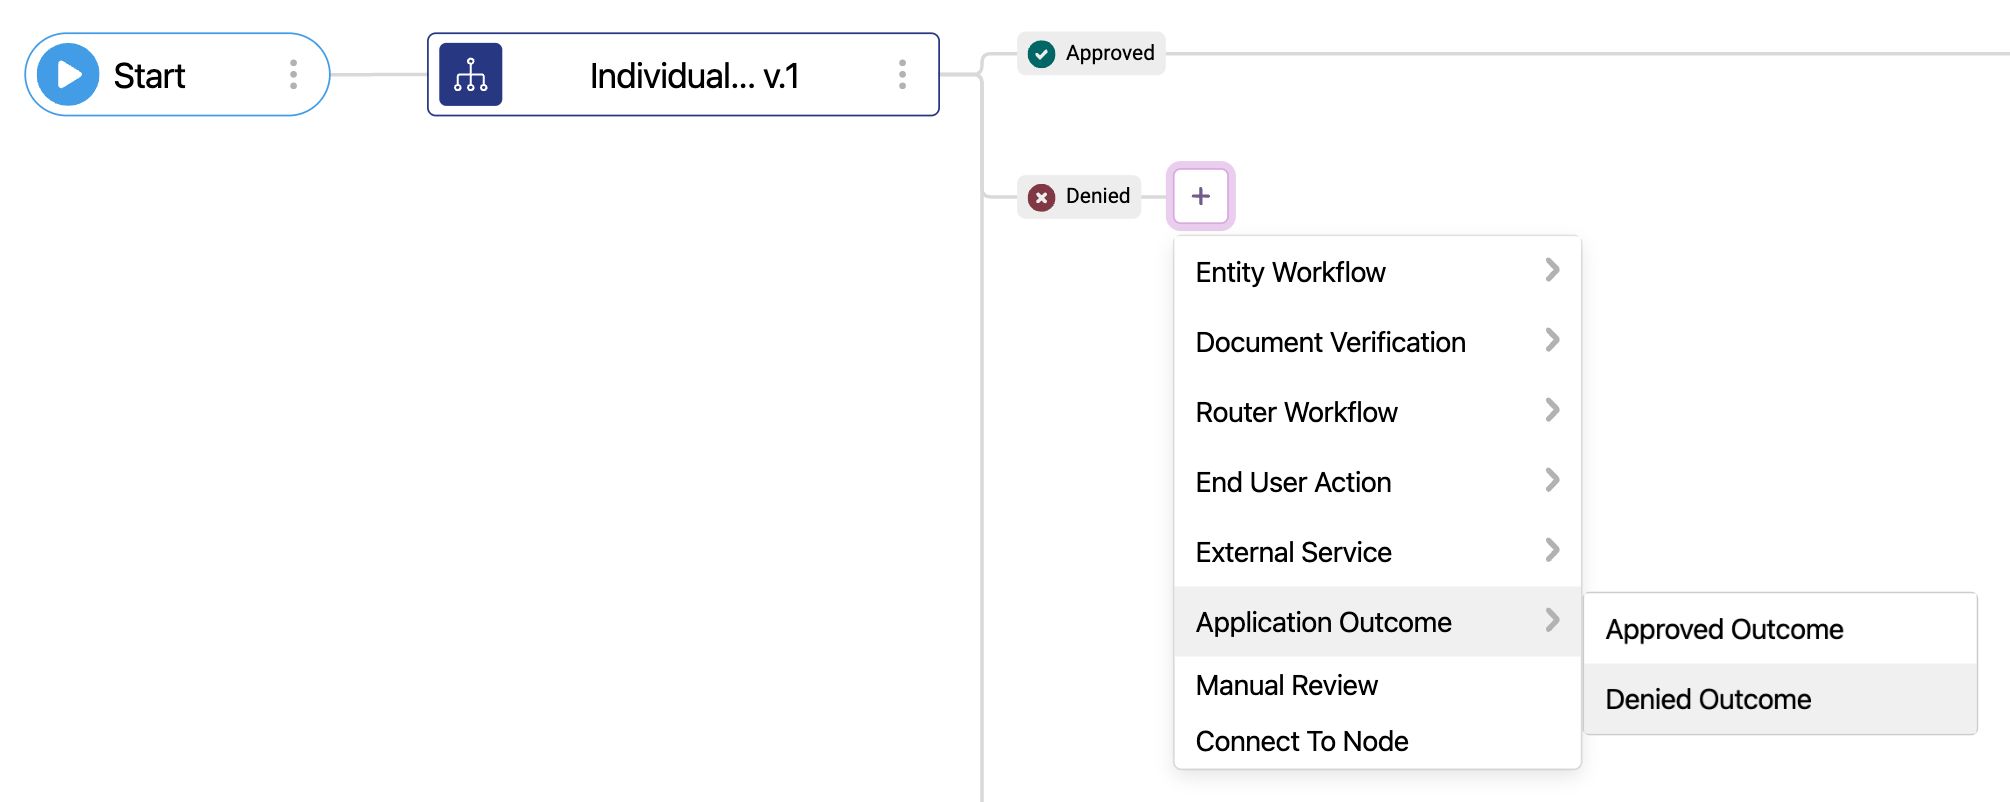
- On the Individual Onboarding > Denied branch, click the + icon, select Application Outcome, then select Denied Outcome.

- For the Document Verification workflow node >
- > Approved branch, click the + icon. Select Connect to Node, then click the Credit Underwriting workflow node to send applicants approved via DocV to CU.

- > Denied branch, click the + icon. Select Application Outcome, then select Denied Outcome.
- > Manual Review branch, click the + icon. Select Review, then select Manual Review. A Manual Review node will be added in addition to Approved and Denied outcome branches.
- On the Manual Review > Approved branch, click the + icon. Select Connect to Node, then click the Credit Underwriting workflow node to send applicants approved via DocV Manual Review to CU.
- On the Manual Review > Denied branch, click the + icon. Select Application Outcome, then select Denied Outcome.
- > Approved branch, click the + icon. Select Connect to Node, then click the Credit Underwriting workflow node to send applicants approved via DocV to CU.
- For the Credit Underwriting workflow node >
- > Approved branch, click the + icon. Select Application Outcome, then select Approved Outcome.
- > Denied branch, click the + icon. Select Application Outcome, then select Denied Outcome.
- > Manual Review branch, click the + icon. Select Review, then select Manual Review.
- On the Manual Review > Approved branch, click the + icon. Select Application Outcome, then select Approved Outcome.
- On the Manual Review > Denied branch, click the + icon. Select Application Outcome, then select Denied Outcome.
- 🎉 Congratulations! The Journey is now complete.
While the Journey configured in this article is just an example, it demonstrates the basic steps to get started creating your own Journeys in the Alloy dashboard. For information on the technical integration for Journeys, see the Alloy developer documentation.
Comments
0 comments
Article is closed for comments.